
Ever wanted to edit the footer on your WordPress website?
Maybe you wanted to add some custom text or links, or perhaps you just wanted to get rid of the “Proudly powered by WordPress” link.
Whatever your reasons are, the footer in WordPress will be different depending on which WordPress theme you use, making it tricky to edit or change.
But don’t ignore the footer menu on your website entirely. This area is still marketable and helpful to your audience. They can use it to navigate other pages on your website or search for topics.
At SheDevsIT, we regularly help business owners manage a well-run WordPress website. But if you’re itching to know how to edit the copyright footer in WordPress or add a search box, you want to do it now.
Hang in there.
I’ll go over in more detail what a footer in WordPress is and then give you several options on how to edit the footer in WordPress: using a free WordPress theme, a paid WordPress theme, using a WordPress plugin, and what do to if you are using Elementor.
What is a footer in WordPress?
In WordPress, the footer is the bottom section of your website that typically contains copyright and attribution information. Many WordPress themes come with customizable footers that allow you to change the text or background color.
This is an example of a footer.

Many business owners use the footer as another menu. But there are other links or ways to use the footer in WordPress:
- Important links like your shop page, services pages, or your contact page
- Links to your Privacy Policy and Disclosure pages
- To display social media buttons
- Add text about how to contact you (phone number, address)
With that out of the way, let’s look more closely at how to edit the footer using WordPress.
How do I edit the footer in WordPress?
If you recently started a WordPress website, WordPress gives you its default theme, currently called Twenty Twenty-Two. It incorporates new functionality called Full Site Editing, which enables you to edit your site’s footer. This is before you pay for a premium theme.
To find the footer to edit, login, and view the front-end of your website. On the upper left-hand side, click on Edit Site.
This opens up the editor. Click on the list view and find Footer.
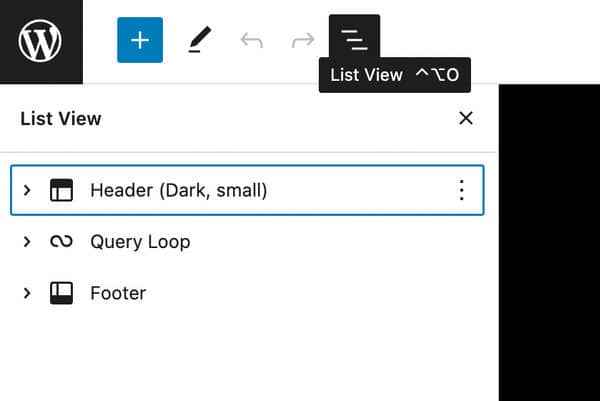
Click on Footer and the three dots. From there, go to Edit Footer.
This is how to edit a footer in WordPress.
Review our website management plans >>
If Using a Free WordPress Theme
As I mentioned, each WordPress theme will have different steps, so even if you know how to edit a footer in one, this doesn’t mean the new WordPress theme you purchase will have the same steps.
For example, in the free version of the Astra theme, to edit a footer in WordPress, go to Customize in the upper left corner after logging in. View your site and put your mouse on the footer bar.
An edit box should appear around the footer. Click on the pencil icon, where you can edit the footer in WordPress.
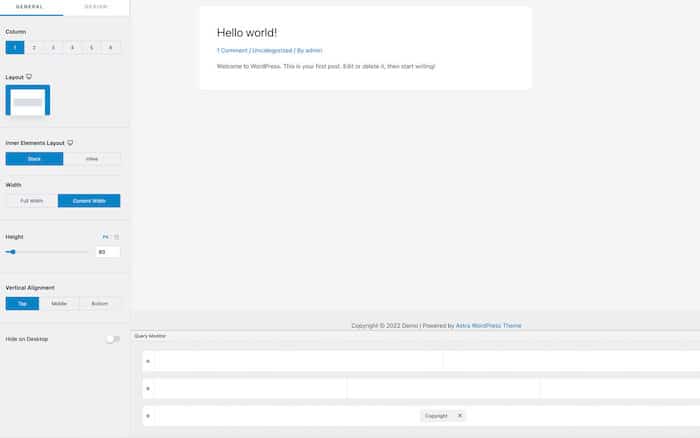
Editing the footer this way is done by adding or removing widgets.
Click on any boxes in the footer to get a + sign. Click the + sign and pick a widget to use.

But what about removing the default text and links in your footer?
With free WordPress themes, they usually don’t come with an easy way to edit the “powered by WordPress” and the name of the theme in the bottom footer. But, that doesn’t mean it’s impossible.
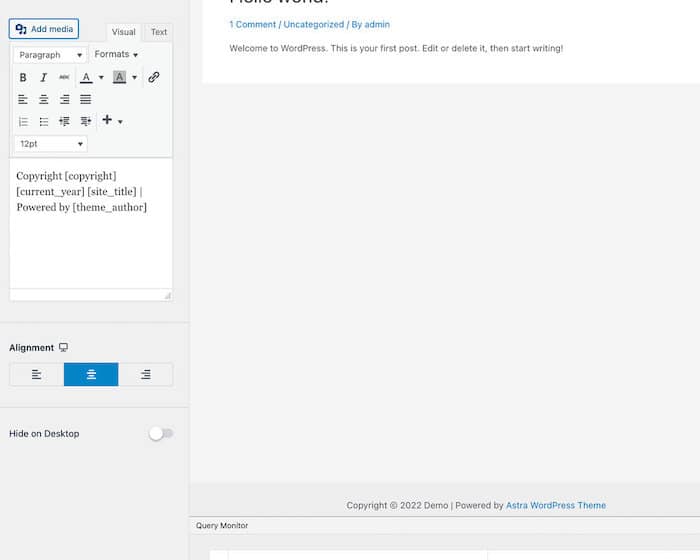
Using Astra again, it’s a straight-forward approach to editing your footer. Click on the Powered by WordPress section of the footer and get the pencil icon.
Click on the pencil and the sidebar to edit or remove that entirely. But as I mentioned, it isn’t easy for all free WordPress themes.
Why a Paid WordPress Theme is Optimal for Editing
While you might think you’re saving money with a free WordPress theme, you’ll be gaining headaches and frustrations in its place.
Instead, opt for a paid theme. Purchased WordPress themes always have more editing options and make a better choice for your online business.
These options include a special place to edit the bottom footer, and you no longer need to use a plugin or complicated coding-based workarounds since the theme will have everything you need to edit the footer menu.
Looking at the Authority Pro Theme – a paid Genesis child theme for WordPress – you can edit the footer in WordPress in two ways: first by changing the copyright information and then by adding widgets or features to your footer.
To change the copyright, click on Customize > Theme Settings > Footer.
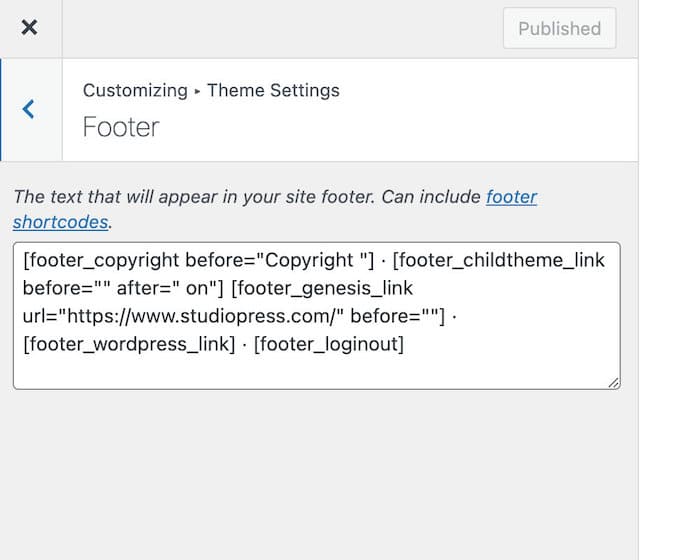
You can add or remove the word copyright or change the link to a different link instead of directing it to StudioPress.
The other method to edit your footer is to go to Customize > Widgets > Footer > Add a Widget.
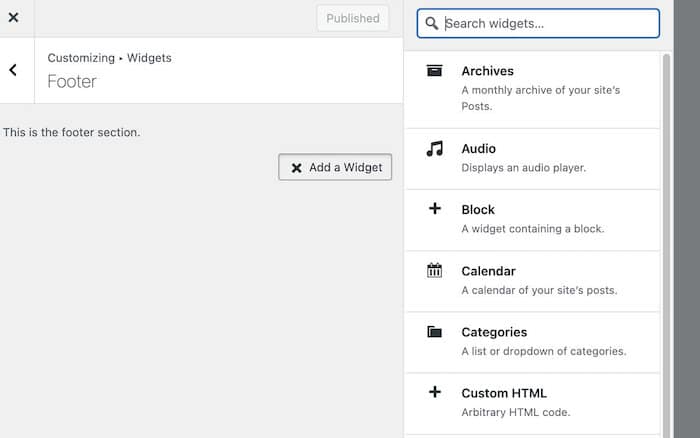
From here, you can pick features you want to have in your Footer.
For example, if I click the text widget, I can add my copy, “Ready for the Next Step?” and see the update live.

In the text box, you can add your links.
This entire process, however, can be frustrating on the user’s end. First, finding where the widgets are (as they aren’t in the same place as the Footer section), aligning your phrases, spacing it out, or just adjusting where to place your copy can be difficult if you don’t know how to code (HTML).
And, of course, this is all different depending on what WordPress theme you use.
The Divi Theme has a Global Footer option that may be easier for you to edit. Here’s a link to a tutorial.
That’s why here at SheDevsIT, we can help you with any website management issues you may have (even if you caused them!). Ask your website manager to remove copy or links in your footer by editing the footer.php file.
What about using a WordPress Plugin to Edit Footer in WordPress?
If you want another method to learn how to edit your footer in WordPress, why not try a WordPress plugin?
Just be aware that a plugin adds unnecessary bloat to the website, and most of these footer plugins rely on HTML – coding. A plugin is a piece of software containing a group of functions to help run your WordPress website. They are like applications for your website.
For this demonstration, I’ll add an attention bar at the footer to convert users to an upcoming summit or webinar training you may have.
In the backend of your WordPress site, go to Plugins>Add New. Search for the WPFront Notification Bar plugin. Install and activate the plugin.
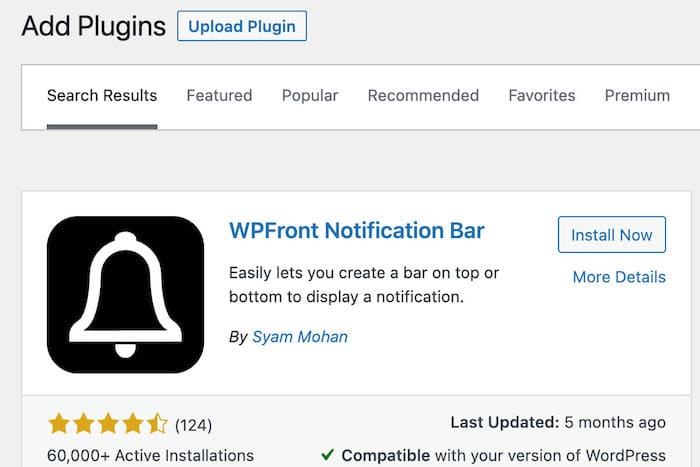
From there, you can customize your notification bar by:
- Bar height
- Color
- Shadow
- Duration
- Font heading
While this is a free WordPress plugin, it is limited in what you can customize.

Check out these footer WordPress plugins for other features:
- Insert Headers and Footers + Custom Code Snippets – more for inserting code like Google Analytics, Facebook Pixel, and custom CSS
- Ad Inserter – Ad specialized ads like Amazon Shopping Ads, Infolinks, Google AdSense, and more.
- Footer Mega Grid Columns – This allows you to add more than one column to your footer. Many WordPress themes only have one or two columns, so this plugin allows you to add columns for better organization.
How do I change the footer in WordPress Elementor?
If you are using Elementor, the easiest way to edit a footer in WordPress is to install the Elementor Header & Footer Builder plugin.
Go to Appearance > Elementor Header and Footer Builder.
By the title on the page, go to Add New. Title your page Footer and Save Draft.
In the Builder Options (under the Edit with Elementor button), set the menu to footer. This will open up options for you to customize your footer menu.

Save your settings and then Edit with Elementor. From here, you can customize the footer with any Elementor style.
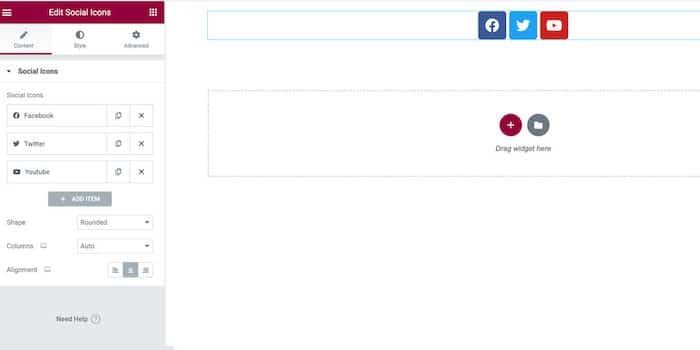
This easy drag-and-drop builder allows you to add any customization to your footer that you want.

Remove Powered by WordPress by editing code
Editing a WordPress footer doesn’t come easy with some themes. It can be virtually impossible without editing the PHP code directly. Or, you could be confusing the “footer widget areas” with the “bottom footer”. The bottom footer is what contains the “powered by WordPress” as well as a link to the theme name and a copyright date. If you can’t see any way to remove or modify the footer credits in the WordPress customizer, then another option is to edit the footer.php code. This isn’t a beginner-friendly method, but it will let you remove the credit from any WordPress theme. So, you’ll want to make sure you have an easy way to backup and restore your website.
Through your website host file manager, go to /wp-content/themes/ and then open the folder for your current theme or child theme.
Inside this folder, find the footer.php file and right-click to open it for editing.
Look for a section of code that includes the ‘powered by’ text. It might look like this:
<div class=”powered-by”><!–?php <br ?–> printf(
/* translators: %s: WordPress. */
esc_html__( ‘Proudly powered by %s.’, ‘twentytwentytwo’ ),
‘WordPress’
);
?></div>
<!– .powered-by –>
You can either delete this code entirely or customize it to suit your needs. For example, you may want to replace the ‘Proudly powered…’ disclaimer with your own copyright notice. I prefer be conservative and replace only the words I’ve highlighted in red text.
After making your changes, click save. If you check your site, then the footer credit will have disappeared. Be sure to clear your browser cache or your server cache in order to view the changes.
